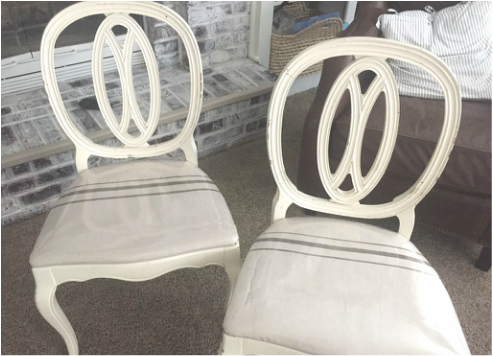
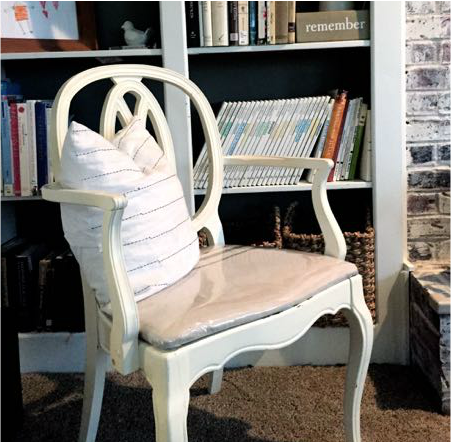
I found six of these lovely dining chairs at my favorite antique store, but the seats were fabric --- and I have four sons --- and fabric covered chairs would not last one snack time in my kitchen. Still I was determined to have these chairs, and I was determined to cover them in white drop cloth. So I figured out a way! Now, two years later you can see they are holding up quite nicely! To make your own drop cloth seat covers you will need:
Good quality canvas drop cloth
Clear Vinyl (Found at the fabric store. The fabric section of Walmart has it sometimes)
Painters tape or masking tape (I used masking tape and it was find, but painters tape is always a safer bet
Paint for the stripes (I used our wall color)
Staple Gun (Got mine at Walmart for $20. I use it ALL the time!)
Directions:
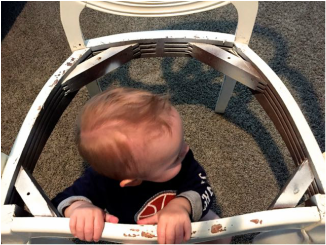 Peekaboo
 1. Remove Your Seat - Use a regular old screwdriver to remove the seat from the chair frame. Repeat with all chairs.
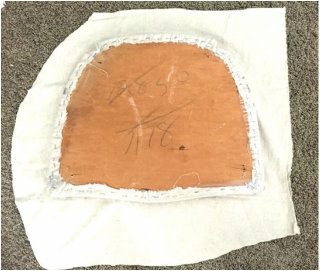
2. Cut Fabric - Lay your seat cushion on the drop cloth and cut around it, leaving 3-4 inches of extra fabric the whole way around the cushion.
Do you see how roughly this is cut? No precise measuring here, just make sure you cut plenty of extra fabric so you have enough to wrap around and be stapled to the back of the seat.
Repeat this step, cutting fabric for all the cushions.
3. Cut Vinyl - Lay the piece of drop cloth onto the vinyl and and cut the vinyl about an inch larger than the piece of drop cloth all the way around. Repeat for all the chairs and set the vinyl aside.
4. Attach drop cloth fabric to the seat- Lay the drop cloth on the ground and set the seat (cushion side down) onto the drop cloth making sure you have an even amount of fabric sticking out on all sides. Staple one side of the drop cloth to the back of the seat. Once the first side is stapled, stretch your fabric to the opposite side and staple in place. Be very generous with your staples, pulling the fabric tight and securing it with LOTS of staples. Once your two sides are in place, it will be quick to staple the remaining sides, making sure to pull your corners tight and leaving no awkward pleats. (If you have any questions about doing this, I suggest watching a youtube tutorial. There are lots of them out there, and that's how I learned.)
4. Attach drop cloth fabric to the seat- Lay the drop cloth on the ground and set the seat (cushion side down) onto the drop cloth making sure you have an even amount of fabric sticking out on all sides. Staple one side of the drop cloth to the back of the seat. Once the first side is stapled, stretch your fabric to the opposite side and staple in place. Be very generous with your staples, pulling the fabric tight and securing it with LOTS of staples. Once your two sides are in place, it will be quick to staple the remaining sides, making sure to pull your corners tight and leaving no awkward pleats. (If you have any questions about doing this, I suggest watching a youtube tutorial. There are lots of them out there, and that's how I learned.)
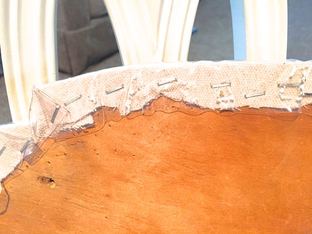
In this picture you can see how many staples I used to hold the fabric in place. This shows both the vinyl and drop cloth...don't let that confuse you! We are still on the drop cloth step, but I wanted to show a picture of how the back should look when you staple the drop cloth in place.
5. Prep for paint - Arrange your tape, creating a stencil for the paint stripes. This does not need to be perfect. Please don't measure! A little variation is a good thing. You can do different patterns on each chair if you want or keep them all similar. I chose to do a similar pattern with three stripes on all the chairs, but since I didn't measure they are all slightly different, and I love that!

6. Paint the stripes - Dip your brush in the paint and then wipe off all excess paint until your brush is practically dry. Now paint on the stripes, making them as light or dark as you like. I used such small amounts of paint that I actually reused the tape from one drop cloth to the next and it didn't spread paint or make a mess. Let the paint dry for a couple of hours at least.
7. Attach vinyl fabric - Stretch the vinyl over the drop cloth, using plenty of staples to keep it secure.
8. Cut off excess - Once your fabric and vinyl are secure with staples, you can cut off your excess around the staples.
9. Re-attach the seat - Get that handy screwdriver back out and secure the seat to the chair frame.
If you give this a try, I would love to see your result! Better yet, if you are willing to share your picture with the world, email it to [email protected] and I will post it here. Happy stapling!


 RSS Feed
